Tile Saws: Cutting Edge Tools for Precision Tiling Projects
Tile saws play a crucial role in construction and home improvement projects. These specialized tools enable precise cuts in various tile materials, ensuring professional-looking results. From DIY enthusiasts to professional contractors, understanding tile saws can significantly impact the quality and efficiency of tiling work. This comprehensive guide explores the world of tile saws, covering their types, features, usage techniques, and maintenance tips.
Types of Tile Saws: Choosing the Right Tool for Your Project
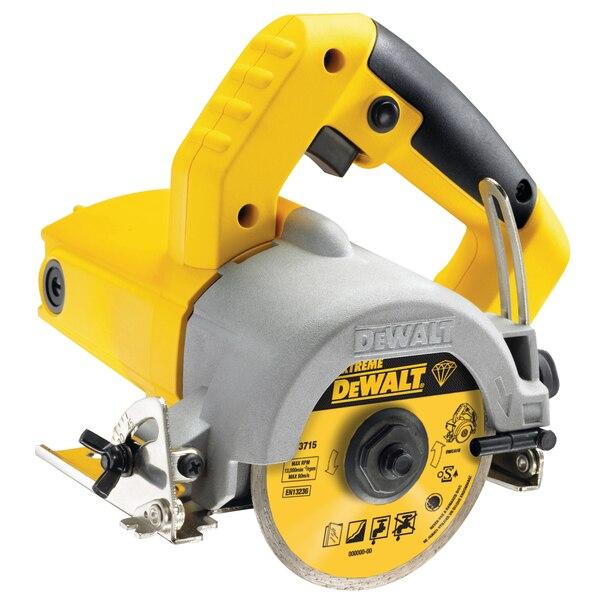
Tile saws come in several varieties, each designed for specific applications. Handheld tile saws offer portability and flexibility for small jobs or tight spaces. These compact tools work well for quick cuts and touch-ups. Tabletop tile saws, also known as wet saws, provide a stable platform for more precise cuts. They use water to cool the blade and reduce dust, making them ideal for larger projects. Overhead motor tile saws feature a powerful motor mounted above the cutting surface, offering enhanced stability and accuracy for professional-grade work.
Rail saws, with their sliding cutting head, excel at making long, straight cuts in large tiles. For intricate cuts and curves, tile nippers and manual scoring tools complement powered saws. When selecting a tile saw, consider factors such as the scale of your project, the types of tiles you’ll be cutting, and your level of expertise. Professionals often invest in multiple types of tile saws to handle various job requirements. Homeowners and occasional DIYers might find a versatile tabletop saw sufficient for most projects. Regardless of the type chosen, quality blades and proper technique remain essential for achieving clean, precise cuts.
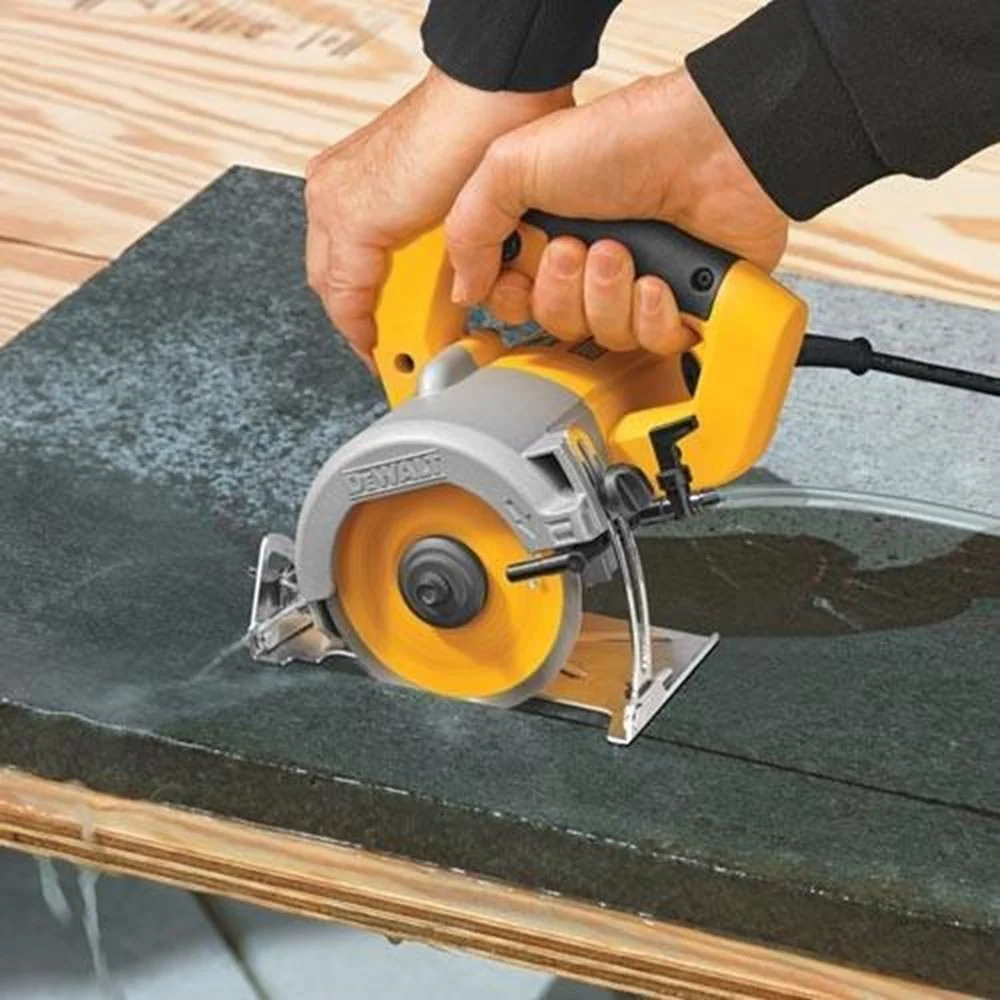
Essential Features: What to Look for in a Quality Tile Saw
Several key features distinguish high-quality tile saws from subpar models. A powerful motor ensures smooth, consistent cuts through even the toughest materials. Look for saws with at least 1.5 horsepower for most home projects, while professional-grade saws may offer 2 horsepower or more. Blade quality significantly affects cut precision and longevity. Diamond-tipped blades provide the best performance and durability for tile cutting. The size of the blade determines the maximum cutting depth, with 7-inch blades suitable for most residential tiles and 10-inch blades handling larger formats.
A sturdy, flat table surface ensures stability during cutting, while adjustable miter guides and rip fences enable accurate straight and angled cuts. For wet saws, an efficient water cooling system prevents overheating and reduces dust. Look for models with smooth-flowing water pumps and easily cleanable reservoirs. Portability features such as compact designs and built-in handles benefit contractors who frequently move between job sites. Safety features, including blade guards and non-slip surfaces, protect users during operation. Some advanced models offer laser guides for enhanced cutting accuracy. When comparing tile saws, consider the warranty and availability of replacement parts, as these factors can significantly impact long-term value.
Setting Up Your Tile Saw: Preparation for Precise Cutting
Proper setup lays the foundation for successful tile cutting. Start by choosing a stable, level surface for your tile saw. For tabletop models, a sturdy workbench or saw stand provides an ideal base. Ensure adequate lighting in your work area to clearly see cutting lines and blade alignment. Next, fill the water reservoir of wet saws to the recommended level, typically just below the cutting surface. This water cools the blade and captures dust during cutting. Check that the water pump functions correctly, providing a steady stream over the blade. For all tile saw types, verify that the blade is sharp, properly aligned, and securely fastened.
Adjust the blade depth to slightly exceed the thickness of your tiles, typically by about 1/8 inch. This depth allows for complete cuts without excessive wear on the saw table. Set up your miter guide and rip fence according to your cutting needs, ensuring they’re square and securely locked in place. Before making any cuts, perform a test run on a scrap piece of tile to confirm proper setup and blade alignment. Wear appropriate safety gear, including safety glasses, hearing protection, and a dust mask, even when using wet saws. Keep the work area clear of obstacles and ensure proper ventilation, especially when cutting materials that may produce harmful dust. With careful setup, your tile saw will be ready to deliver precise, consistent cuts for your tiling project.
Mastering Cutting Techniques: Achieving Professional-Quality Results
Mastering various cutting techniques elevates your tiling work to professional standards. Start with straight cuts, the most common in tiling projects. Mark your cutting line clearly on the tile using a pencil or tile marker. Align the tile against the rip fence, ensuring it’s square to the blade. Slowly push the tile through the blade, maintaining steady pressure. For wet saws, ensure a consistent flow of water over the blade during cutting. When making diagonal cuts, use the miter guide set to the desired angle. For L-cuts or notches, make two perpendicular cuts, stopping short of the intersection. Then, use tile nippers to remove the cut piece carefully.
Curved cuts require patience and practice. Score the curve on the tile surface, then make a series of closely spaced straight cuts along the curve. Use tile nippers to smooth out the edges. For holes in tiles, such as for pipes or outlets, use a drill with a diamond-tipped hole saw attachment. Start at a slight angle to prevent the bit from slipping, then straighten as you drill through. Always cut from the front of the tile to prevent chipping on the visible surface. For especially intricate cuts, consider using a manual scoring tool followed by tile nippers for greater control. Remember to take breaks during long cutting sessions to prevent fatigue, which can lead to errors. With practice and attention to detail, these techniques will help you achieve clean, precise cuts in various tile materials.

Safety First: Protecting Yourself While Using Tile Saws
Safety should always be the top priority when operating tile saws. These powerful tools require respect and careful handling to prevent accidents. Start by wearing appropriate personal protective equipment (PPE). Safety glasses shield your eyes from debris and water spray, while hearing protection guards against the loud noise produced by the saw. A dust mask or respirator protects your lungs from fine particles, even when using wet saws. Wear close-fitting clothing to avoid loose fabric getting caught in the blade, and non-slip footwear to maintain stable footing. Before each use, inspect your tile saw for any damage or wear.
Check the power cord for frays or cuts, and ensure all guards and safety features are in place and functioning correctly. Keep your work area clean and free of clutter to prevent tripping hazards. When operating the saw, maintain a stable stance and keep your hands well away from the blade. Never reach across the blade while it’s spinning, and wait for it to come to a complete stop before adjusting the tile or clearing debris. For wet saws, be cautious of water spillage, which can create slippery conditions. Regularly check and maintain proper water levels to ensure effective cooling and dust suppression. Unplug the saw when changing blades or performing maintenance. Store tile saws in a dry, secure location out of reach of children when not in use. By following these safety practices, you can minimize risks and enjoy the benefits of efficient, precise tile cutting.
Blade Selection and Maintenance: Keeping Your Cuts Clean and Efficient
Selecting the right blade and maintaining it properly significantly impacts the performance and longevity of your tile saw. Diamond-tipped blades are the industry standard for tile cutting, offering superior cutting ability and durability. Choose blades designed for the specific material you’re cutting, whether it’s ceramic, porcelain, natural stone, or glass. Continuous rim blades provide smooth cuts in harder materials, while segmented blades offer faster cutting in softer tiles. The blade’s diameter should match your saw’s specifications, typically ranging from 7 to 10 inches for most home-use tile saws. Regularly inspect your blade for signs of wear, such as missing diamond segments or warping.
A dull or damaged blade can lead to chipped tiles and increased strain on the saw motor. Clean your blade after each use, removing any buildup of tile dust or debris. For wet saws, allow the blade to dry completely before storage to prevent rust. Periodically check the blade’s tension and alignment, adjusting as necessary to ensure straight, accurate cuts. Some professionals recommend “dressing” diamond blades by making a few cuts in abrasive materials like concrete blocks to expose fresh cutting edges. When it’s time to replace your blade, choose a high-quality option that matches your saw’s RPM rating and arbor size. Proper blade care not only improves cutting performance but also extends the life of both the blade and the saw itself. By investing time in blade selection and maintenance, you’ll achieve consistently clean cuts and improve the overall efficiency of your tiling projects.
Cutting Different Tile Materials: Techniques for Various Types
Different tile materials require specific cutting techniques to achieve the best results. Ceramic tiles, being relatively soft, cut easily with most tile saws. Use a standard continuous rim blade and moderate feed rate for clean cuts. Porcelain tiles, known for their hardness and density, demand more careful handling. Opt for a high-quality porcelain-specific blade and reduce your feed rate to prevent chipping. When cutting natural stone tiles like marble or granite, use a blade designed for stone and make slower, more controlled cuts to avoid cracking. Glass tiles require special attention due to their fragility. Use a glass-specific blade with continuous rim and very slow feed rate to prevent chipping and cracking.
For mosaic tiles, often mounted on mesh backing, cut through both the tiles and the mesh in one pass, using a blade appropriate for the tile material. When cutting large format tiles, ensure proper support on both sides of the cut to prevent sagging and potential breakage. For especially thick tiles or pavers, you may need to make multiple passes, gradually increasing the cutting depth. Always start with a test cut on a spare tile to gauge the appropriate technique and blade performance for each material. Cool the blade frequently when dry cutting to prevent overheating, which can lead to blade damage and poor cut quality. By adapting your approach to each tile type, you’ll achieve cleaner cuts and reduce waste from broken or chipped tiles.
Troubleshooting Common Issues: Overcoming Tile Saw Challenges
Even with proper technique and maintenance, tile saw users may encounter various challenges. Chipping along cut edges often results from a dull blade or too fast feed rate. Address this by replacing the blade or slowing down your cutting speed. If straight cuts appear curved or wavy, check the blade for proper alignment and tension. Ensure the tile is pressed firmly against the fence throughout the cut. Excessive dust during cutting may indicate insufficient water flow in wet saws. Check the pump and clean any clogged water jets. For dry cutting, consider using a dust shroud attachment. If the motor bogs down during cuts, you may be overloading it. Make shallower passes or switch to a more powerful saw for thicker materials.
Uneven wear on the blade can cause poor cut quality and increased vibration. Replace blades that show signs of uneven wear or damage. Water leakage in wet saws often stems from overfilled reservoirs or damaged seals. Maintain proper water levels and replace worn gaskets or seals. If the saw won’t start, check the power source, cord, and switch for any issues. GFCI outlets may trip when using wet saws; ensure proper grounding and avoid excessive moisture around electrical components. Unusual noises during operation can indicate loose parts or bearing issues. Inspect and tighten all fasteners, and lubricate moving parts as recommended by the manufacturer. By promptly addressing these common issues, you can maintain the performance and longevity of your tile saw, ensuring consistent, high-quality cuts for all your tiling projects.

Maintaining Your Tile Saw: Extending the Life of Your Investment
Regular maintenance keeps your tile saw performing at its best and extends its lifespan. After each use, clean the saw thoroughly, removing all tile dust and debris. For wet saws, empty and clean the water reservoir to prevent algae growth and mineral buildup. Dry all components to prevent rust, paying special attention to metal surfaces. Lubricate moving parts according to the manufacturer’s recommendations, typically using a dry lubricant to avoid attracting dust. Check and tighten all bolts and screws periodically, as vibration can cause them to loosen over time.
Inspect the power cord and plug for any signs of wear or damage, replacing them if necessary. Keep the blade clean and sharp, replacing it when signs of wear become apparent. For wet saws, check the water pump regularly, cleaning or replacing the filter as needed. Store your tile saw in a dry, dust-free environment, covering it to protect against dust accumulation. If you use your saw infrequently, run it briefly every few months to prevent motor issues. Keep a log of maintenance activities and any repairs performed.
This record helps track the saw’s condition and anticipate when parts may need replacement. For professional users, consider having your saw serviced annually by a qualified technician. They can perform more in-depth maintenance and catch potential issues before they become serious problems. Proper maintenance not only ensures consistent performance but also contributes to workplace safety by keeping all components in good working order. By investing time in regular care, you’ll maximize the value of your tile saw and ensure it remains a reliable tool for years to come.
Accessories and Upgrades: Enhancing Your Tile Saw’s Capabilities
Various accessories and upgrades can enhance the functionality and precision of your tile saw. Stands designed specifically for your saw model provide stability and often include wheels for easy transport. These stands can improve comfort during prolonged use and ensure level cutting surfaces. Laser guides project a line onto the tile, allowing for more accurate alignment before cutting. While not essential, they can be particularly helpful for intricate patterns or when working with large format tiles. Side extension tables increase the support area for larger tiles, reducing the risk of breakage during cutting. Some models offer adjustable legs to accommodate uneven surfaces at job sites.
Diamond blade dressing stones help maintain the cutting edge of your blades, extending their life and ensuring clean cuts. For wet saws, upgrading to a more powerful water pump can improve cooling and dust suppression, especially when cutting harder materials. Dust shrouds and vacuum attachments for dry-cutting saws significantly reduce airborne dust, improving workplace safety and cleanliness. Specialized jigs and fixtures can assist with repetitive cuts or unique angles, increasing efficiency on large projects.
Some manufacturers offer digital measurement systems that integrate with the saw, providing precise readouts for cut lengths and angles. While these accessories can be valuable, prioritize those that address your specific needs and work patterns. Quality basic accessories, such as spare blades and a good tile marker, often provide the most immediate benefits. By carefully selecting accessories and upgrades, you can tailor your tile saw to your specific requirements, improving both the quality of your work and your overall efficiency.

