Mastering the Multimeter: A Comprehensive Guide to Electrical Measurement
A multimeter serves as an indispensable tool for anyone working with electrical systems, from professional electricians to DIY enthusiasts. This versatile device combines the functionality of a voltmeter, ammeter, and ohmmeter, allowing users to measure voltage, current, and resistance in various electrical components and circuits. Understanding how to properly use a multimeter not only enhances the accuracy of electrical measurements but also ensures safety when working with electricity. This guide will walk through the essential steps and techniques for using a multimeter effectively, covering everything from basic setup to advanced troubleshooting applications.
Understanding the Multimeter: Types and Features
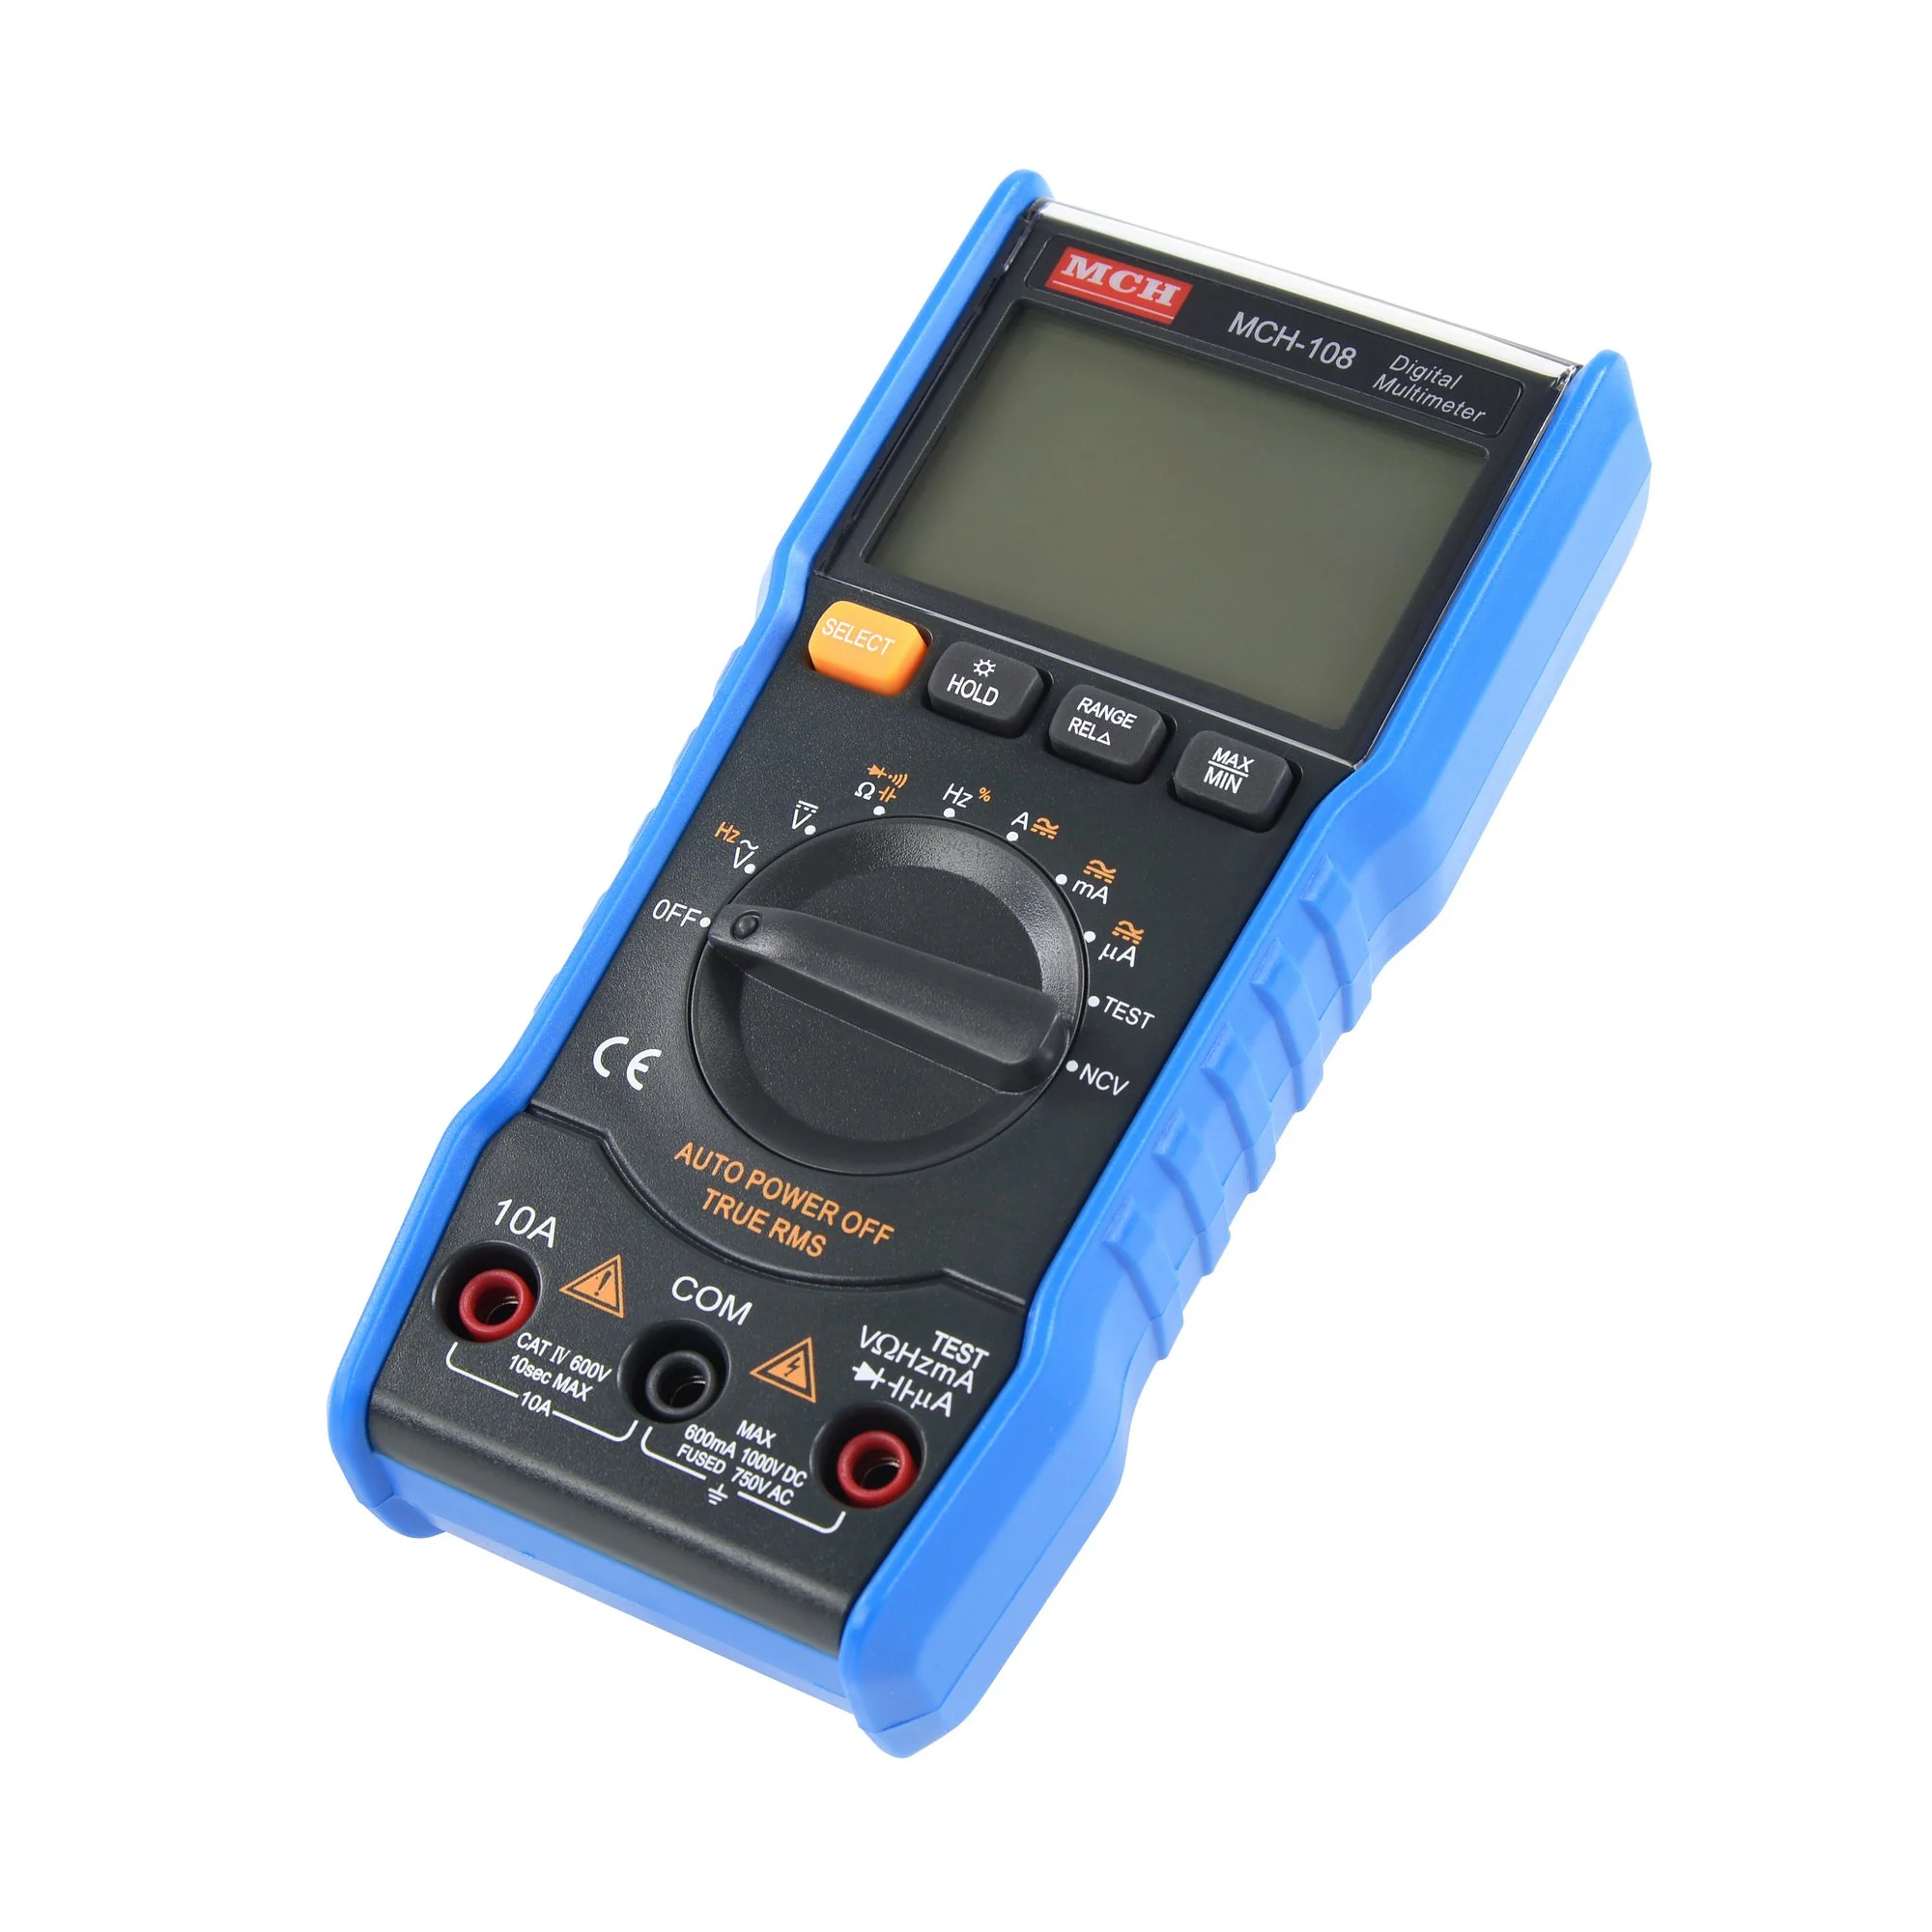
Multimeters come in two main types: analog and digital. Analog multimeters use a moving needle to display readings, while digital multimeters (DMMs) provide numerical readings on an LCD screen. Digital multimeters have become more popular due to their ease of use and higher accuracy. Key features of a typical multimeter include selectable measurement ranges, a display screen, probe leads, and a rotary switch or buttons to select different measurement functions.
Advanced multimeters may offer additional features such as autoranging, data hold, and the ability to measure temperature or capacitance. Understanding these features and how they contribute to the multimeter’s functionality is crucial for effective use. Users should familiarize themselves with their specific multimeter model, referring to the user manual for detailed information on its capabilities and operation.
Safety First: Precautions When Using a Multimeter
Safety should always be the top priority when working with electrical equipment. Before using a multimeter, ensure it is rated for the voltage and current levels you intend to measure. Inspect the multimeter and its probe leads for any signs of damage or wear. Never use a multimeter with frayed wires or cracked casing. When measuring high voltages, use one hand to manipulate the probes to avoid creating a path for current across your chest.
Always start with the highest range setting when measuring unknown voltages to prevent damage to the meter or injury. Be cautious of capacitors in circuits, as they can hold a charge even when the power is off. When working on live circuits, use insulated tools and wear appropriate personal protective equipment, such as insulated gloves and safety glasses. Remember, electricity can be deadly, and proper safety practices are essential for preventing accidents and injuries.
Setting Up Your Multimeter for Measurement
Proper setup is crucial for accurate measurements and safe operation of a multimeter. Begin by selecting the appropriate function on the multimeter’s rotary switch or button panel. Common functions include voltage (V), current (A), and resistance (Ω). For voltage and current, choose between AC and DC settings based on the type of circuit you’re testing. Next, select the appropriate range for your measurement. If unsure, start with the highest range and work your way down for more precise readings.
Insert the probe leads into the correct ports on the multimeter. Typically, the black lead goes into the COM (common) port, while the red lead goes into the port corresponding to your measurement type (voltage, current, or resistance). Some multimeters have separate ports for high current measurements. Always double-check your setup before connecting the probes to a circuit to prevent damage to the meter or the circuit under test.
Measuring Voltage with a Multimeter
Voltage measurement is one of the most common uses for a multimeter. To measure voltage, set the multimeter to the voltage function (V) and select AC or DC as appropriate. For unknown voltages, start with the highest range. Place the black probe on the reference point (usually ground or the negative terminal) and the red probe on the point where you want to measure voltage. For DC voltage, pay attention to polarity; reversed probes will give a negative reading.
When measuring AC voltage, polarity doesn’t matter. Hold the probes steady and read the display. If the reading is much lower than the selected range, switch to a lower range for more precision. Remember, when measuring voltage, the multimeter is connected in parallel with the circuit component. This method allows for safe measurement of voltage in live circuits without interrupting the current flow. Always exercise caution when working with high voltages and never exceed the multimeter’s voltage rating.
Measuring Current with a Multimeter
Measuring current requires a different approach compared to voltage measurement. The multimeter must be connected in series with the circuit, which means breaking the circuit and inserting the meter into the path of current flow. Start by setting the multimeter to the current function (A) and selecting the appropriate range. For safety, always start with the highest range when measuring unknown currents. Most multimeters have separate ports for high current measurements, typically fused for protection.
Break the circuit at the point where you want to measure current and connect the multimeter in series. The black probe connects to the COM port, and the red probe to the appropriate current input port. Once connected, the circuit can be energized, and current will flow through the multimeter. Read the display and adjust the range if necessary for more precise measurements. Remember, measuring high currents for extended periods can heat up the multimeter, so limit the duration of such measurements.

Measuring Resistance with a Multimeter
Resistance measurements are performed on de-energized circuits or components. Set the multimeter to the resistance function (Ω) and select an appropriate range. If measuring an unknown resistance, start with the highest range and work down. Before measuring, ensure the circuit is completely de-energized and any capacitors are discharged to prevent damage to the multimeter. Touch the probes to the two points across which you want to measure resistance.
The order of the probes doesn’t matter for resistance measurements. For accurate readings, ensure good contact between the probes and the measurement points. If measuring the resistance of a component in a circuit, it’s often best to remove the component or disconnect one end to avoid parallel resistances affecting the reading. Some multimeters have a continuity function, which emits a beep for very low resistances, useful for checking for short circuits or verifying connections. Remember that the multimeter itself introduces a small resistance into the measurement, which can affect readings of very low resistances.
Advanced Multimeter Functions: Capacitance, Frequency, and Temperature
Many modern multimeters offer additional measurement capabilities beyond voltage, current, and resistance. Capacitance measurement allows users to test capacitors, crucial for electronics troubleshooting. To measure capacitance, set the multimeter to the capacitance function (usually denoted by a capacitor symbol) and connect the probes to the capacitor leads, ensuring it’s discharged first. Frequency measurement is useful for testing oscillators or checking AC power quality.
Set the meter to the frequency function (Hz) and connect the probes to the signal source. Some multimeters can measure temperature using a thermocouple probe. Insert the thermocouple into the appropriate ports and set the meter to temperature mode. These advanced functions expand the multimeter’s utility, making it an even more versatile tool for electrical and electronic work. However, users should be aware that the accuracy of these additional functions may not match that of dedicated, specialized instruments for these measurements.
Troubleshooting with a Multimeter
A multimeter is an invaluable tool for diagnosing electrical and electronic problems. When troubleshooting, start by verifying power supplies and checking for proper voltage levels at various points in the circuit. Use the continuity function to check for breaks in wires or traces on printed circuit boards. Resistance measurements can help identify faulty components, such as open or shorted resistors. When working with semiconductors, the diode test function (if available) can check for proper operation of diodes and the base-emitter junctions of transistors.
For intermittent problems, the min/max or data logging functions found on some advanced multimeters can capture fluctuations over time. When troubleshooting complex circuits, it’s often helpful to compare measurements to known good values or schematic diagrams. Remember to approach troubleshooting systematically, forming hypotheses and using the multimeter to confirm or refute them. With practice, users can develop intuition about which measurements are most likely to reveal the source of a problem quickly.

Maintaining and Calibrating Your Multimeter
Proper maintenance ensures the longevity and accuracy of a multimeter. Store the multimeter in a clean, dry place when not in use, preferably in a protective case. Regularly inspect the probe leads for wear or damage, replacing them if necessary. Clean the multimeter with a soft, dry cloth; avoid using solvents or abrasives. For battery-powered multimeters, remove the batteries if the device won’t be used for an extended period to prevent battery leakage. Periodically check the accuracy of your multimeter by measuring known values, such as a fresh battery for voltage or a precision resistor for resistance.
Many professional environments require regular calibration of multimeters to ensure their accuracy meets certain standards. Calibration typically involves comparing the multimeter’s readings to those of a higher-accuracy reference instrument and adjusting as necessary. While professional calibration services are available, some advanced users may choose to perform basic calibration themselves using calibration standards. However, for critical measurements or in professional settings, certified calibration by an accredited laboratory is often required.
Choosing the Right Multimeter for Your Needs
Selecting the appropriate multimeter depends on the intended use and budget. For basic household electrical work, a simple digital multimeter with voltage, current, and resistance measurement capabilities may suffice. Electronics hobbyists might prefer a multimeter with additional functions like capacitance and frequency measurement. Professional electricians and engineers often require high-accuracy multimeters with advanced safety features and durability for field use. Consider the maximum voltage and current ranges you’ll need to measure, as well as the desired accuracy.
True RMS capability is important for accurately measuring non-sinusoidal AC waveforms. For working in dark environments, a backlit display can be very useful. Some multimeters offer data logging or computer connectivity, which can be valuable for detailed analysis or record-keeping. Ultimately, the best multimeter balances functionality, accuracy, safety features, and cost to meet the user’s specific needs. Reading reviews and comparing specifications can help in making an informed decision when purchasing a multimeter.

